TurnKey Lender allows companies to import external data batches that contain the details of different system components and entities without API (as Excel files). This article contains a brief overview of the import processes. Please see its child articles for more details descriptions of each type of import.
Import Screens
To run the import:
Go to Tools → Import

Select what you want to import (Customers, Loans, etc.).
Click the Download template button.
Open the template and fill the data into the Excel file. Mandatory fields are marked with an asterix.
Click Choose file and upload the file with data into the system.
For more details please see Migrate Customer Data Into TurnKey Lender via Import
Import Flows
There are three basic import flows:
Importing existing disbursed loans
Importing loan applications on which disbursement has not yet been performed
Importing dictionaries
Importing Existing Disbursed Loans
If a loan has already been disbursed, there is no need for the system to check customer details and risks. In this case, it is enough to:
1. Import Customers
Import details of the Customers, for which loans will be added. The only mandatory field is the customer e-mail. If the customer already exists in the system, you may skip the step. For more details see Import Customer Batch
2. Import Loans with Disbursements
Import details of the loans. Mandatory fields include:
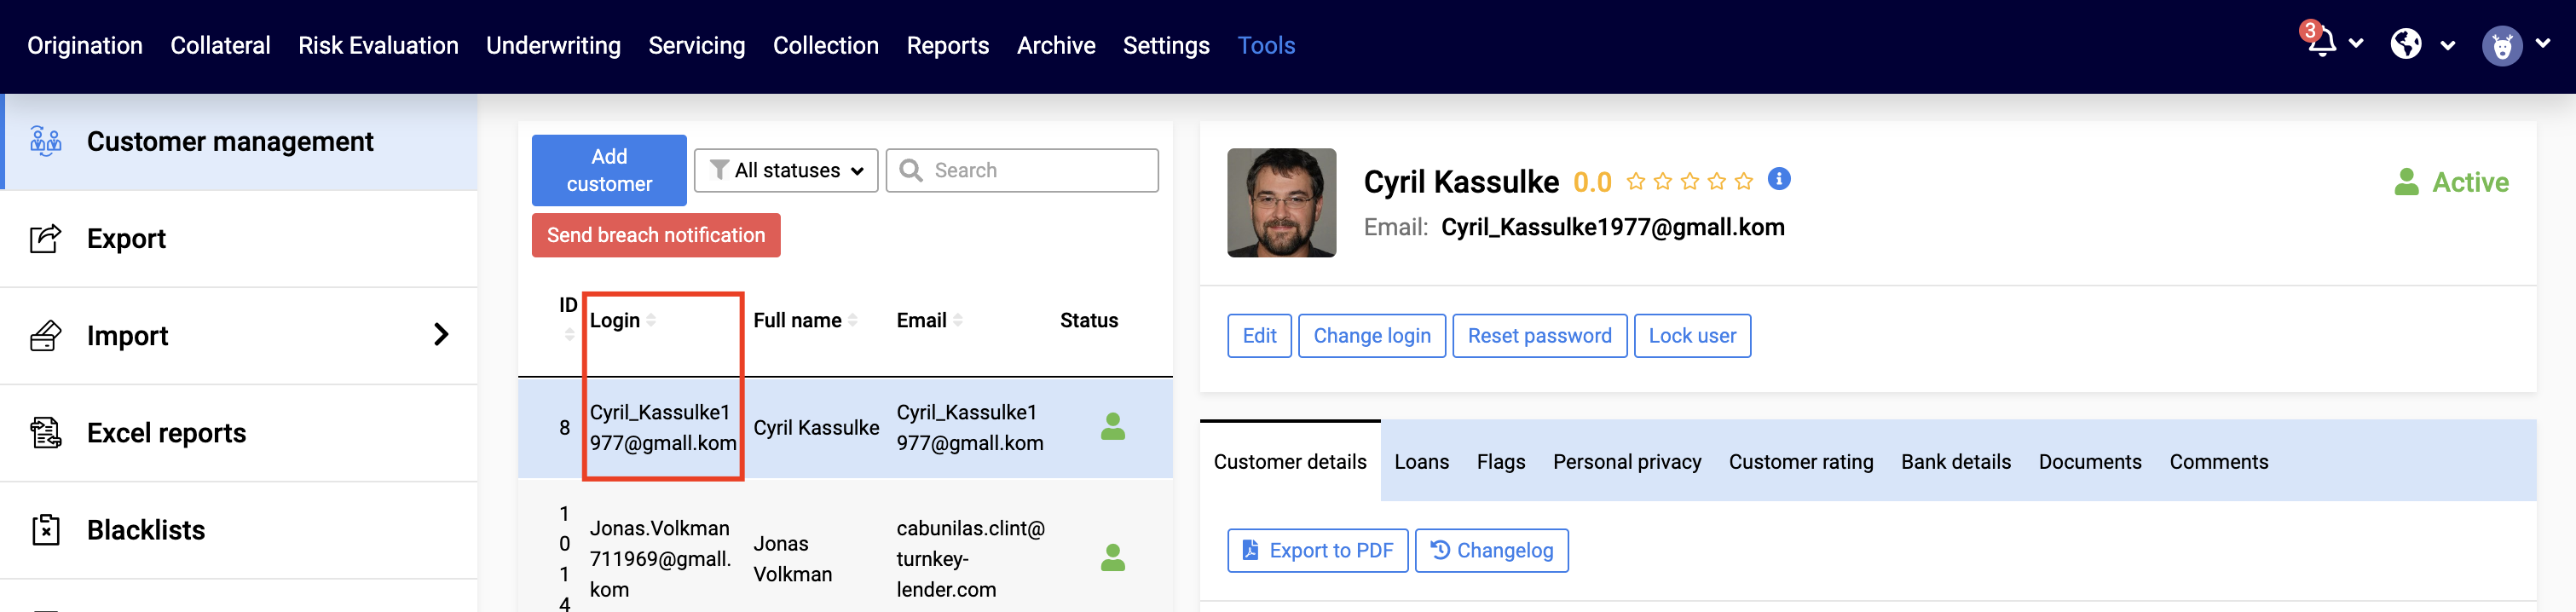
Login: Customer’s login. You can see it in the Tools → Customer Management → Login
Credit product: Name of the credit product as specified in the Setting → Loan Settings → Credit Products
Loan amount: Amount of the loan
Loan term: How long the term is, where Value is the number of units, and Periodicity is the units, e.g. for a loan term of 6 month, the Value = 6 and Periodicity = Month, for a loan of 2 years, the Vaule = 2 and Periodicity = Year
For the system to know that the loan has been disbursed, you need to include details of the disbursement, even though they are not marked as mandatory.
These details correspond to details of the disbursement in the UI
For more details please see Import Loan Batch
3. Import Payments
Once loan is added to the system as active, you can Import Payments. Payment details correspond tot he details of the disbursement in the UI.
For more detail please see Import Payments
Importing loan applications on which disbursement has not yet been performed
When a new loan is imported, it is important for the system to have enough information for its further processing. Therefore, you can
Provide all necessary information during the import: The loan will be created in Origination or Underwriting status (subject to your business flow)
Provide part of the information: The loan will be created in Pre-Origination statua and will require additional details
For such loans, after customer and loan details have been imported, you can additionally import disbursements. (see Import Disbursements Batch )
When a credit line is added to the system, the Disbursement information shall be left empty. It can then be registered in the system with the Disbursement Batch Import. This means, that in order to import active credit lines, you need to complete all the obligatory customer details first (either via import or via UI) |
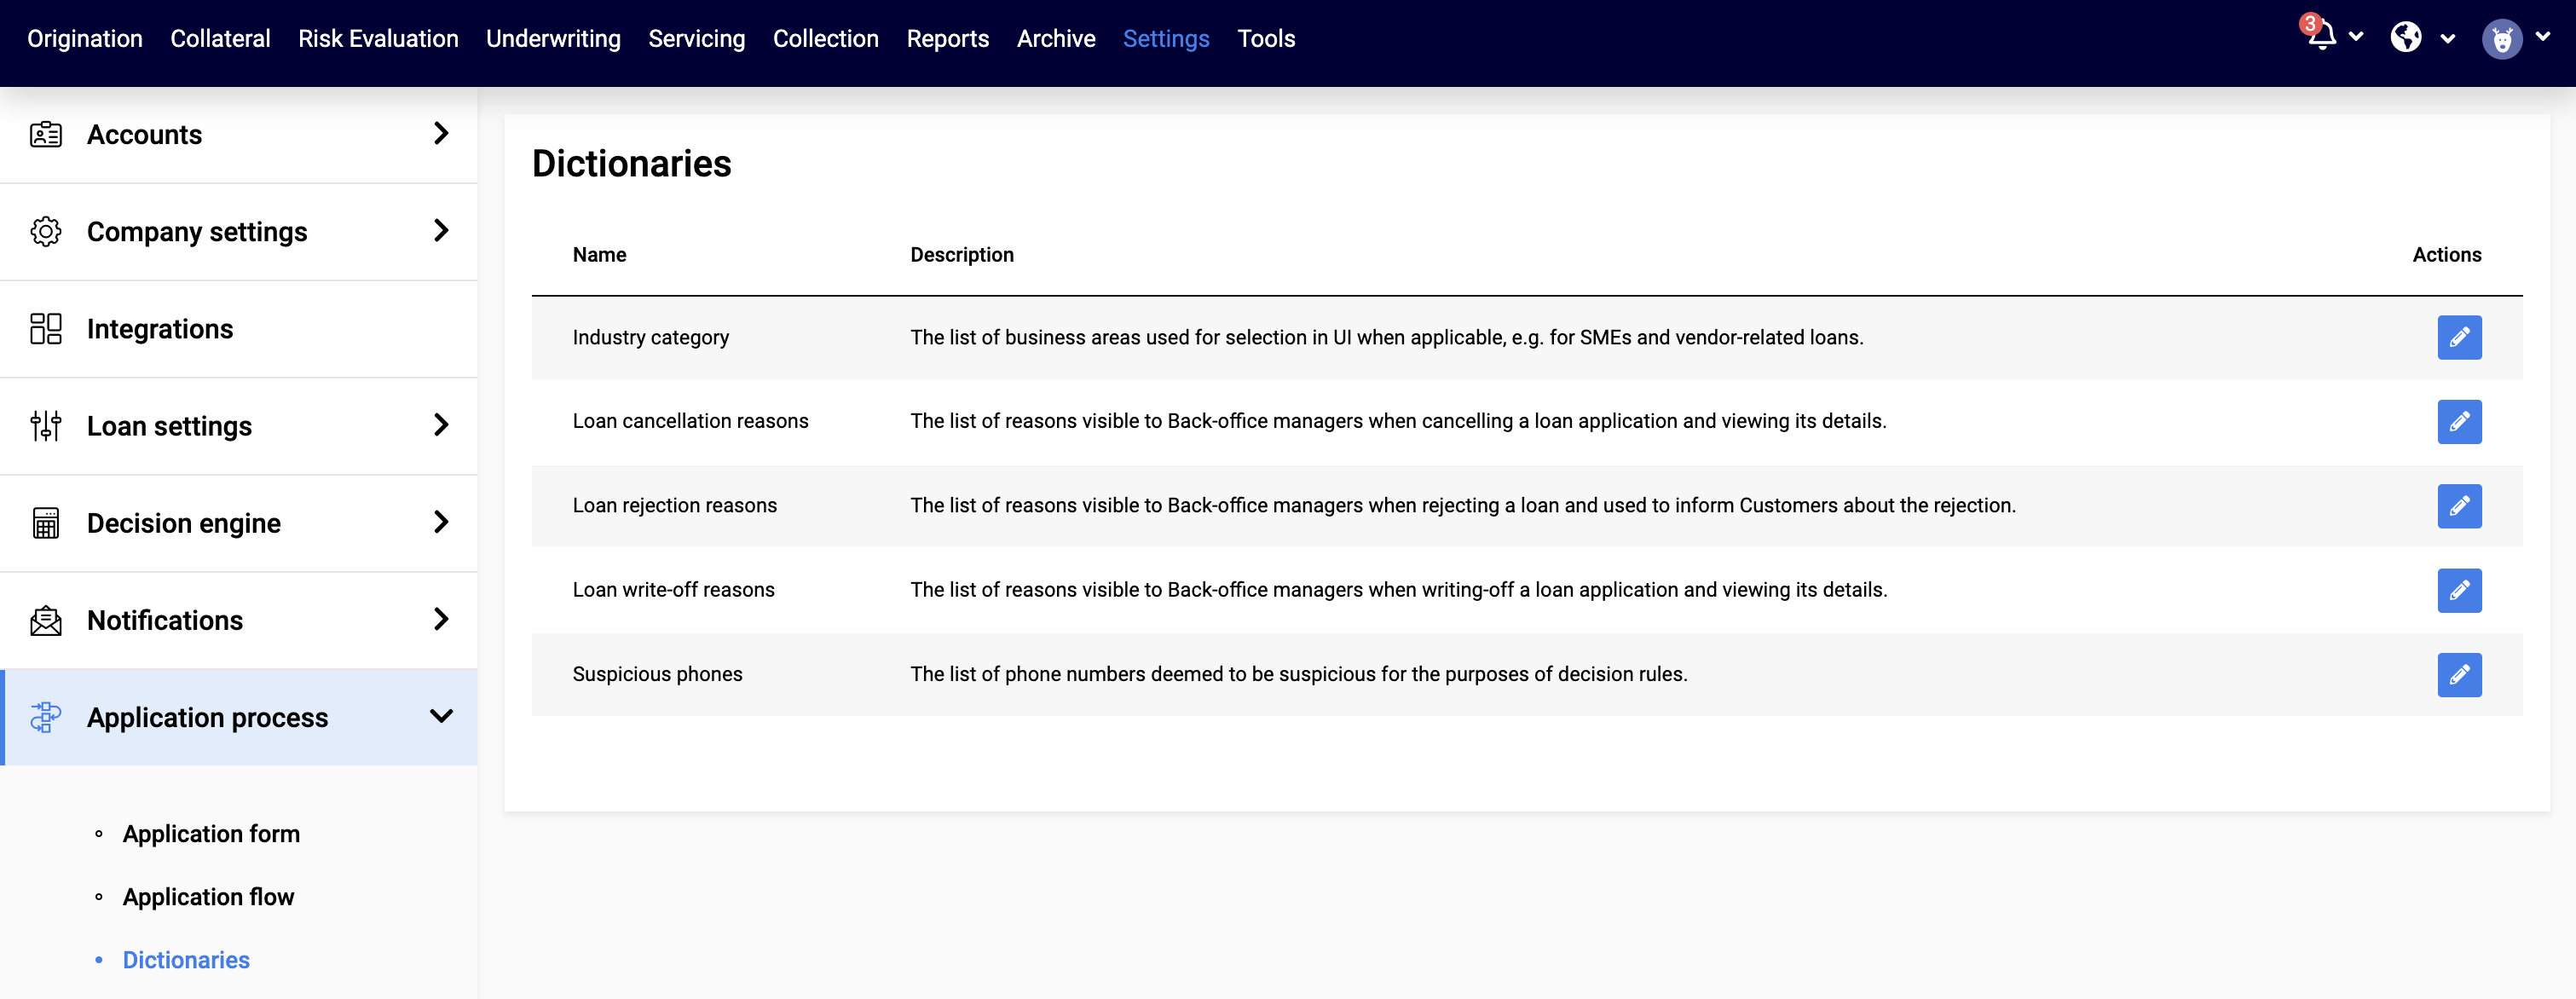
Importing Dictionaries
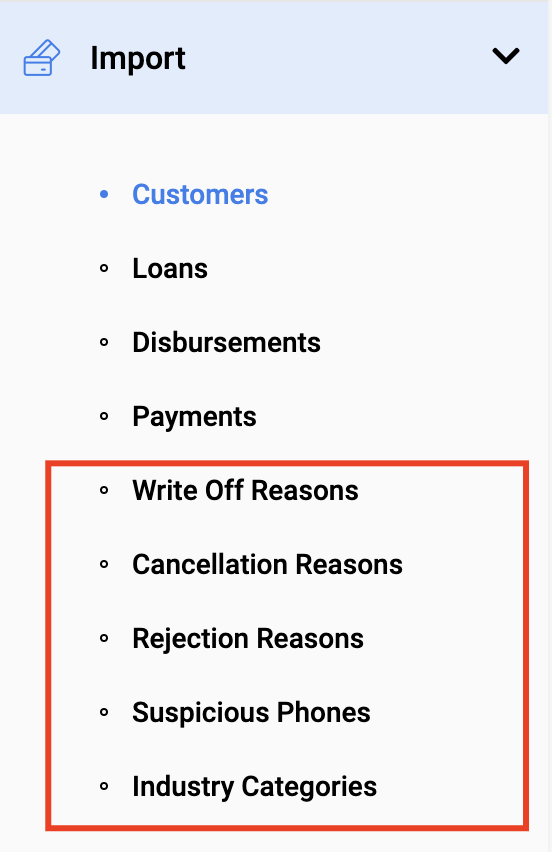
Write-off reasong, cancellation reasons, rejection reasons, suspicious phones and industry categories can also be imported via Excel files.
These are the same lists that can be defined from the Settings → Application process → Dictionaries.
Customers
Loans
Disbursements
Payments
Write Off Reasons
Cancellation Reasons
Rejection Reasons
Suspicious Phones
Industry Categories
Customer Batch Import
The only mandatory field is email. It will also be used as the customer’s login.
The rest of the fields depend on your company’s Application Form. If the application form foresees more mandatory fields and they have not been provided, the Customer is created with the status “Incomplete”. In particular, this will happen if the form requires any photos and documents - as photos and documents cannot be migrated via customer import.
Disbursement Batch Import
To register a disbursement in the system, you must provide the following details:
Loan Id: Unique identifier of the loan, for which the disbursement has been performed. Loan Id may be defined for loans in the course of the loan batch import (as an optional field) or will be automatically assigned to the loans populated into the system.
Date: Date of the disbursement. If the optional “Disbursement → Date” field has been defined for the corresponding loan, the date defined in the disbursement must be the same,
Reference: Disbursement reference number used to refer to this disbursement in the system. If the optional “Disbursement → Reference” field has been defined for the corresponding loan, the reference defined in the disbursement must be the same.
Other (optional) disbursement details are:
Type: In general there are two types of disbursement called:
Automatic: in-the-system disbursement, initiated from inside the system and performed via a payment service provider
Manual: out-of-the-system disbursement. Regardless of the name, it doesn’t have to be performed manually - it is any disbursement performed beyond our system (via an external payment provider, face-to-face, with any kind of financial interests and mutual set-offs, etc.)
If the optional “Disbursement → Type” field has been defined for the corresponding loan, the reference defined in the disbursement must be the same.
Amount: Amount disbursed
Comment: Comment on the disbursement. If the optional “Disbursement → Comment” field has been defined for the corresponding loan, the reference defined in the disbursement must be the same.
Credit Lines
As none of the disbursement details have been provided during the Loan Batch Import for credit lines, you can create multiple disbursements for them using the Disbursement Batch import.
Payments Batch Import
To populate a payment into the system, the following fields are mandatory
Loans: Loan ID, disbursement date, amount, reference and payment type required to register the loan in the system.
Disbursements
Payments
Write Off Reasons
Cancellation Reasons
Rejection Reasons
Suspicious Phones
Industry Categories
with customers, loans, or payments to your TurnKey Lender portal. The data import process includes external data transfer, error checking and fixing, and import of the necessary info.
Loan Id * | Date * | Amount * | Reference * | Payment type * |
Navigate to Tools > Import to access the functionality.
Select the necessary page based on the data type you want to import (Customers, Loans, or Payments).
Download the template and fill out the file with the necessary information.
Then upload an .XLS or a .CSV file to the System in the same window.
The import consists of 3 steps in the following order:
2. Loans
General information:
To import loans into the System, you need to get the Excel template ('Download template' button), fill the file with your data, and upload it (‘Choose file’ button).
After that, preview import results to fix any errors and see if all the records were processed successfully. New loans won’t be created in the System unless you confirm the import.
Loans are created in Origination status if the Disbursement date is empty.
Loans are created in Active/Past due status if the Disbursement date is filled.
Once loans have been imported the Pop-up message 'Loans imported successfully' appears.
The loan ID column is added to the export excel file.
Example ‘loans_template’ file below:
The 1st Loan:
First Payment Date can't be earlier or equal to the Disbursement Date.
First Payment Date can't be earlier or equal Start Date.
The 2nd Loan:
The Lloan Amount does not correspond to the Credit product.
The Loan Term does not correspond to the Credit products.
First Payment Date can't be earlier or equal the Disbursement Date.
First Payment Date can't be earlier or equal Start Date.
The 3rd loan will be ready for import
The loan ID column is added to the export excel file.
You will find this loan on the Servicing Workplace by Loan ID with Active Status because of the filled Disbursement date.
The 4th loan will be ready for import
Loan ID column is added to the export excel file.
Loan is created in Origination Workplace with Origination status because Disbursement date is empty.
3. Payments
General information:
Payments can be imported for loans in Active or Past Due, waiting for Initial payment statuses. The payments parameters must match the loan (amount, date, loan status etc).
Date: Date can't be in the future and Payment date can't be earlier then disbursement
Once Payments have been imported the Pop-up message 'Payments imported successfully' appears
Example ‘payments_template’ file below:
The 1-st Loan will appears on the ‘Archive’ WP with ‘Repaid’ status because of full payment.
The 2-nd Loan will appears on the Servicing WP with ‘Active’ status.
Before you import the template pay attention to the option of sending notifications to customers.
It is recommended to disable any notifications while you’re importing customers, otherwise, they will receive non-relevant notifications regarding loans, which may confuse them.
For example - you have imported disbursements already but haven’t imported re-payments yet. A lot of loans will go to Past due state and customers will receive notifications regarding their debt, which won’t be accurate.