The article describes how to upload system document templates.
The workflow may vary for different editions of Turnkey Lender.
Step-by step instructions
General workflow
- In the Main Menu, select System.
- Go to the Documents page. The list of documents uploaded to the system will be displayed as a grid.
- In the Actions column, click the Upload button next to the necessary document template (Figure 1). The Upload dialog box will appear (Figure 2).
- In the dialog box, click the Choose file button.
- Choose a file with the template in .doc or .docx file formats.
- (Optional) Leave a comment in the Comments area.
- Click OK.
Workflow for US Edition
- In the Main Menu, select System.
- Go to the States Management page.
- Tick the Status checkbox for the necessary state (Figure 3).
- A window will appear where you can whether use Default settings for NSF fee and APR or specify individual settings for this state. Click Save to complete state activation.
- To upload the agreement,
- click the Upload button for this state and choose the file to be uploaded
OR - follow the general workflow above (make sure to select the necessary state on the step 3).
- click the Upload button for this state and choose the file to be uploaded
Turnkey Lender US Edition offers the possibility to upload two optional documents – the Borrower Agreement and the Terms of Use. For those documents, the same procedure as for Loan Agreements applies.

Figure 1

Figure 2
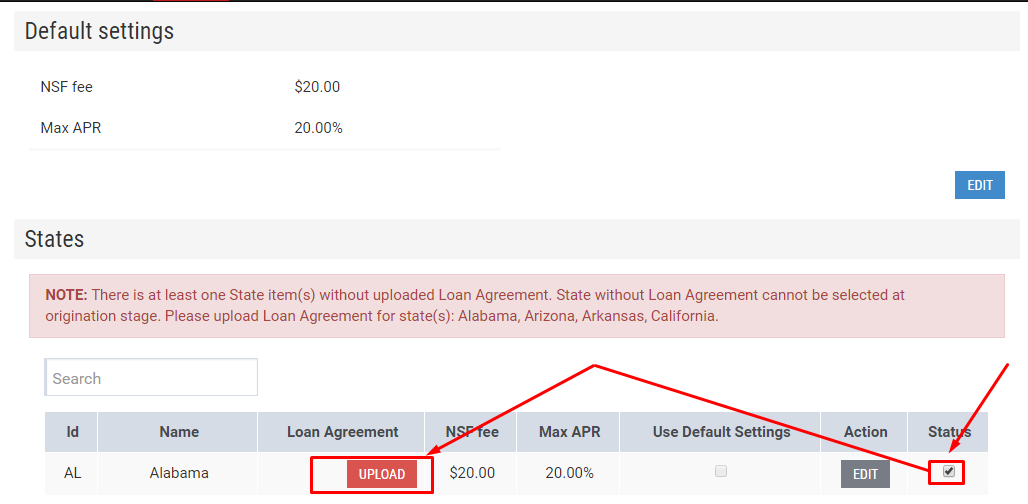
Figure 3

Figure 4
Related articles