| Table of Contents |
|---|
Business Objective
Turnkey Lender System allows creating a flexible system in order to restrict loan visibility based on a branch office/sub-branch offices.
For example:
- For Users, linked to a branch "A" displays all loans in the system.
- For Users, linked to a branch "B" displays only loans created by the users of branch "B" and its sub-branches.
The "Branch office" feature is useful for allocation workplaces between partners, dealers or branches.
More detailed functionality you can see below.
Workflow Diagram
Drawio contentId 831062349 simple 0 zoom 1 inComment 0 pageId 790265891 diagramDisplayName Untitled Diagram2.drawio lbox 1 contentVer 7 revision 7 baseUrl https://turnkey-lender.atlassian.net/wiki diagramName Untitled Diagram2.drawio width 1302 links tbstyle height 751
Workflow diagram displays interaction between the loan created from the Front-office and the loan created from the Back-office.
Loan application assignment to the branch
...
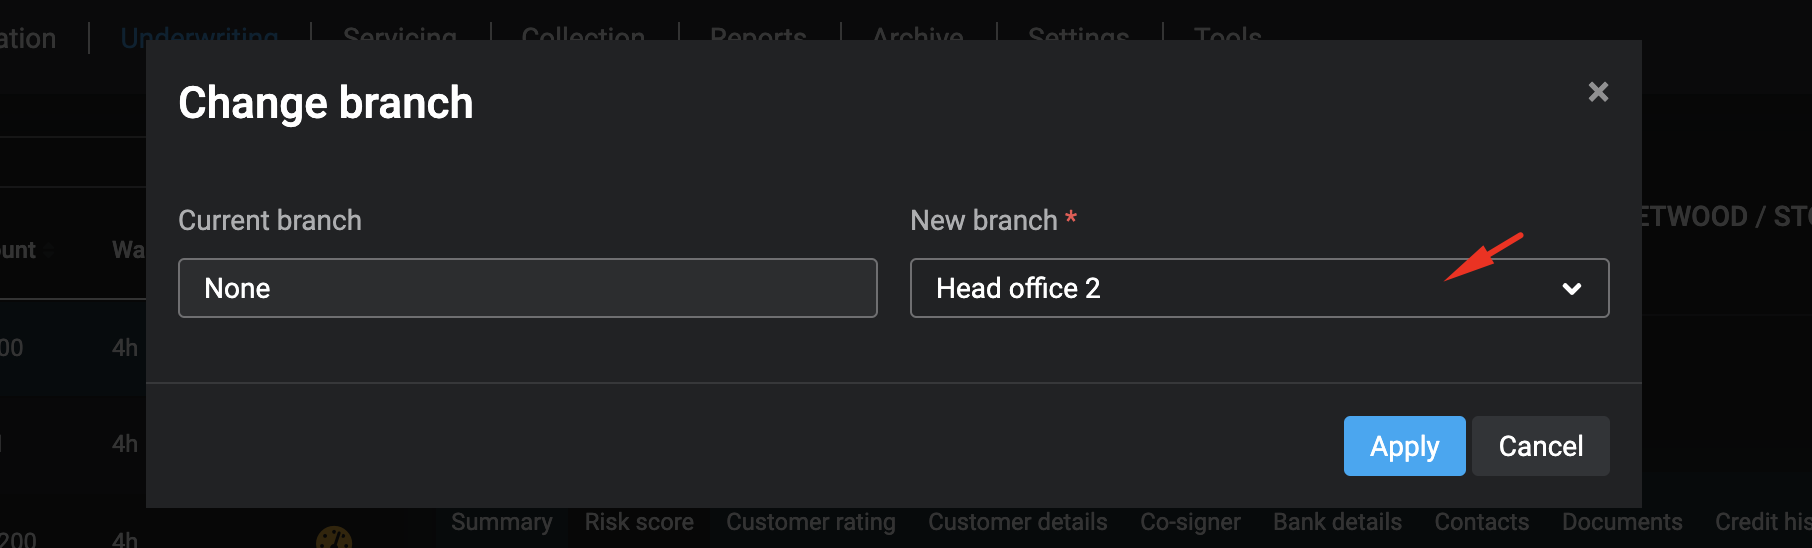
Add a new branch to the System
This subsection describes the procedure of creating a new branch window.
Only Users with Administrator rule can create branches and sub-branches.
To create a branch:
1. In order to add a new Branch Office, navigate to System workplace - click on Branch Offices page.
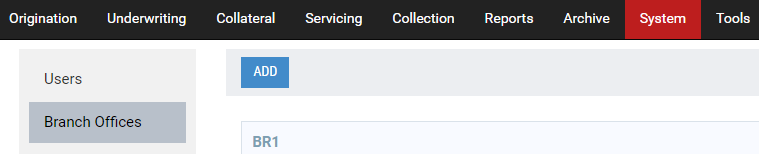
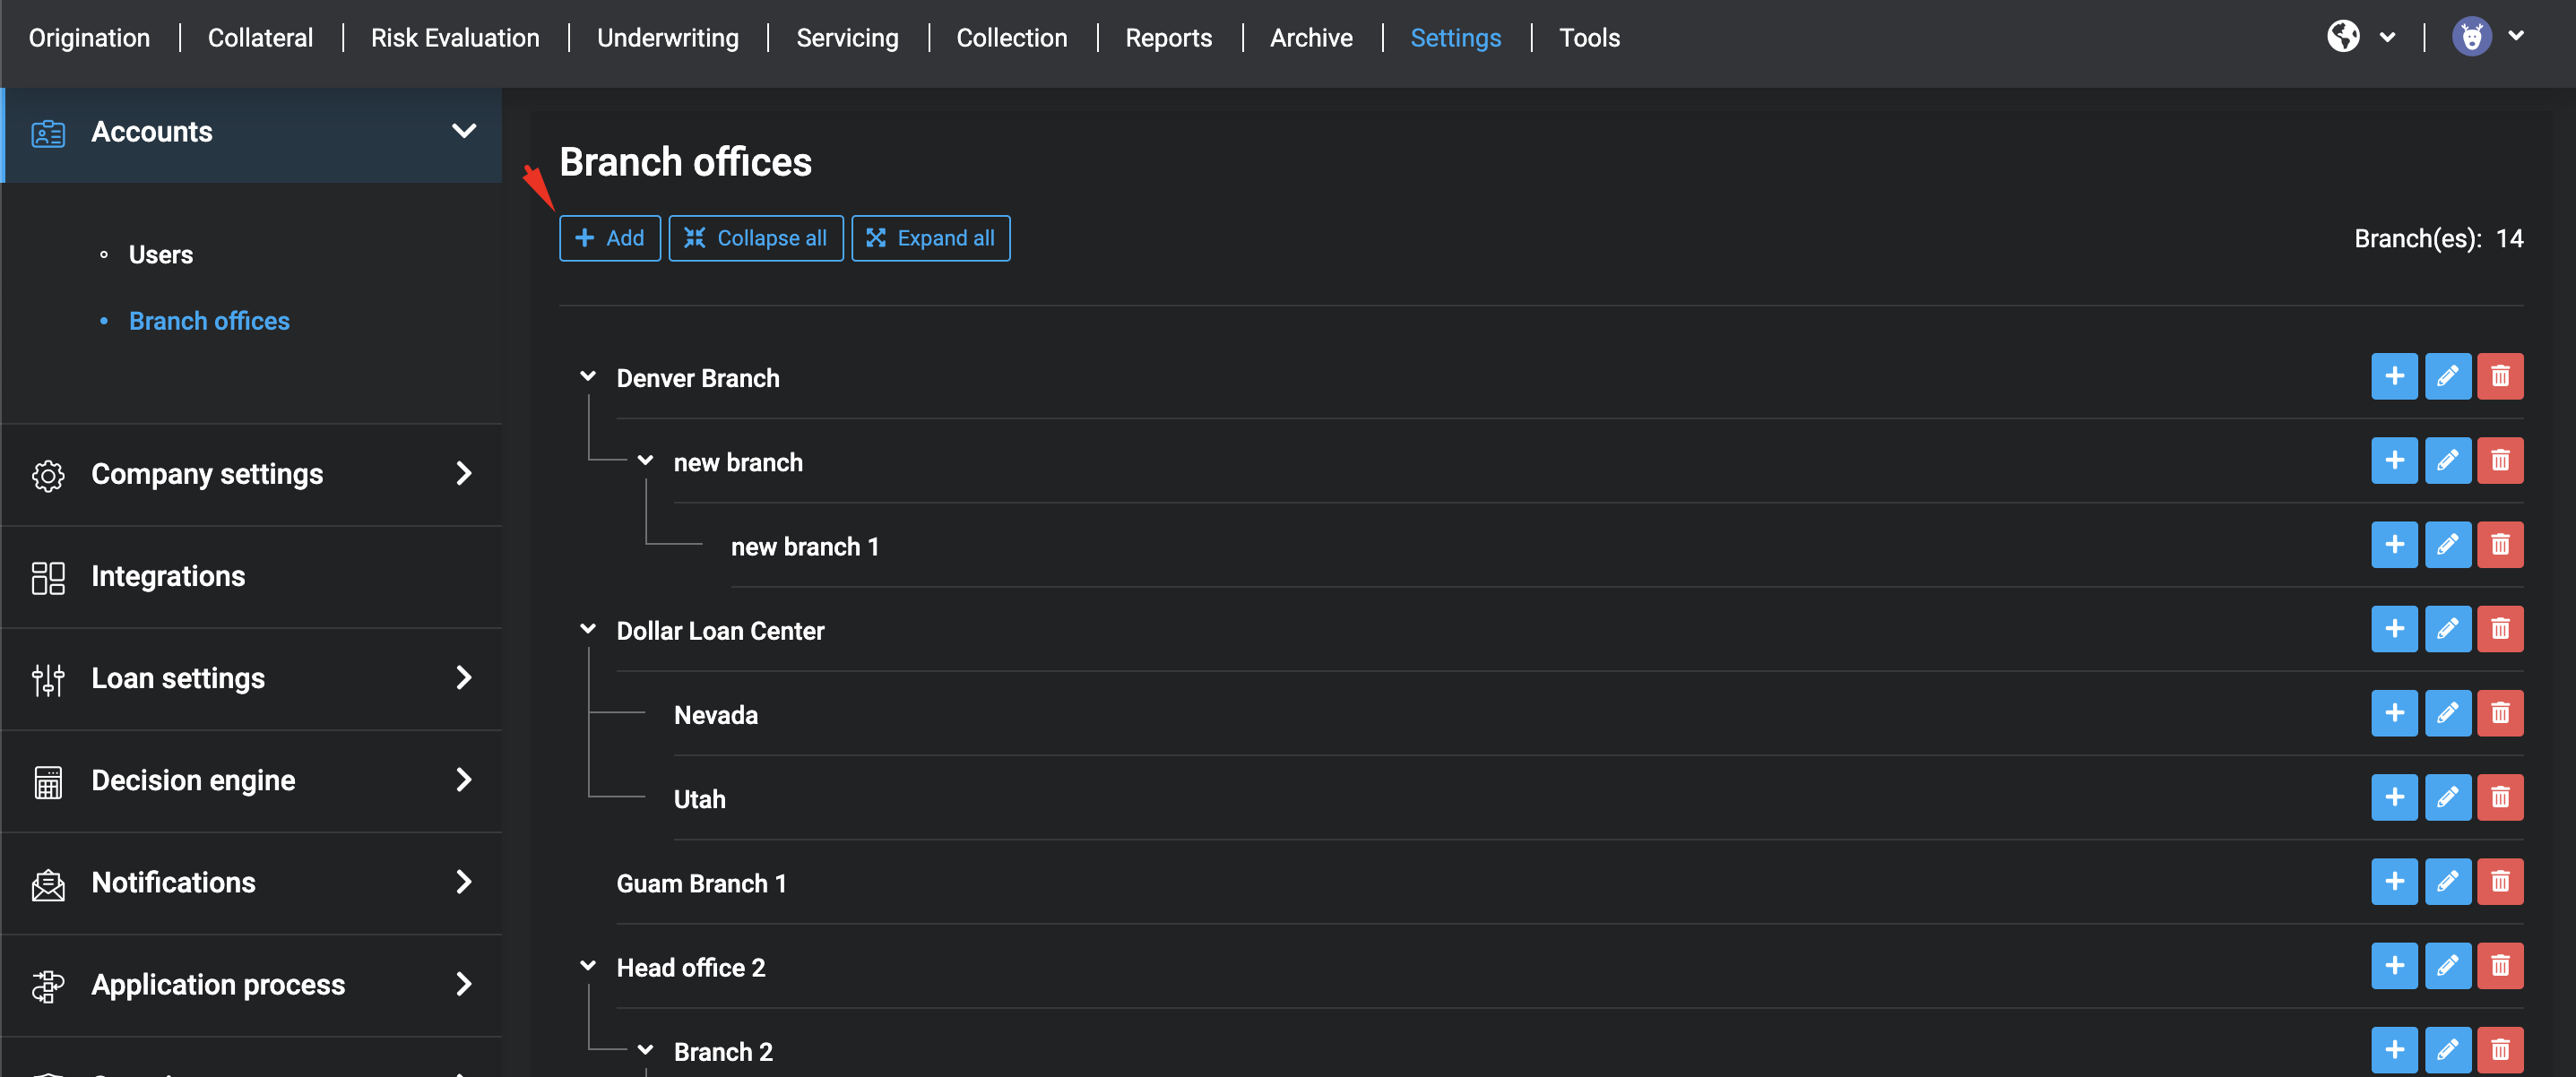
2. Click the Add button.
The Add Branch window opens:
...
The new branch field is added to the bottom of the list:
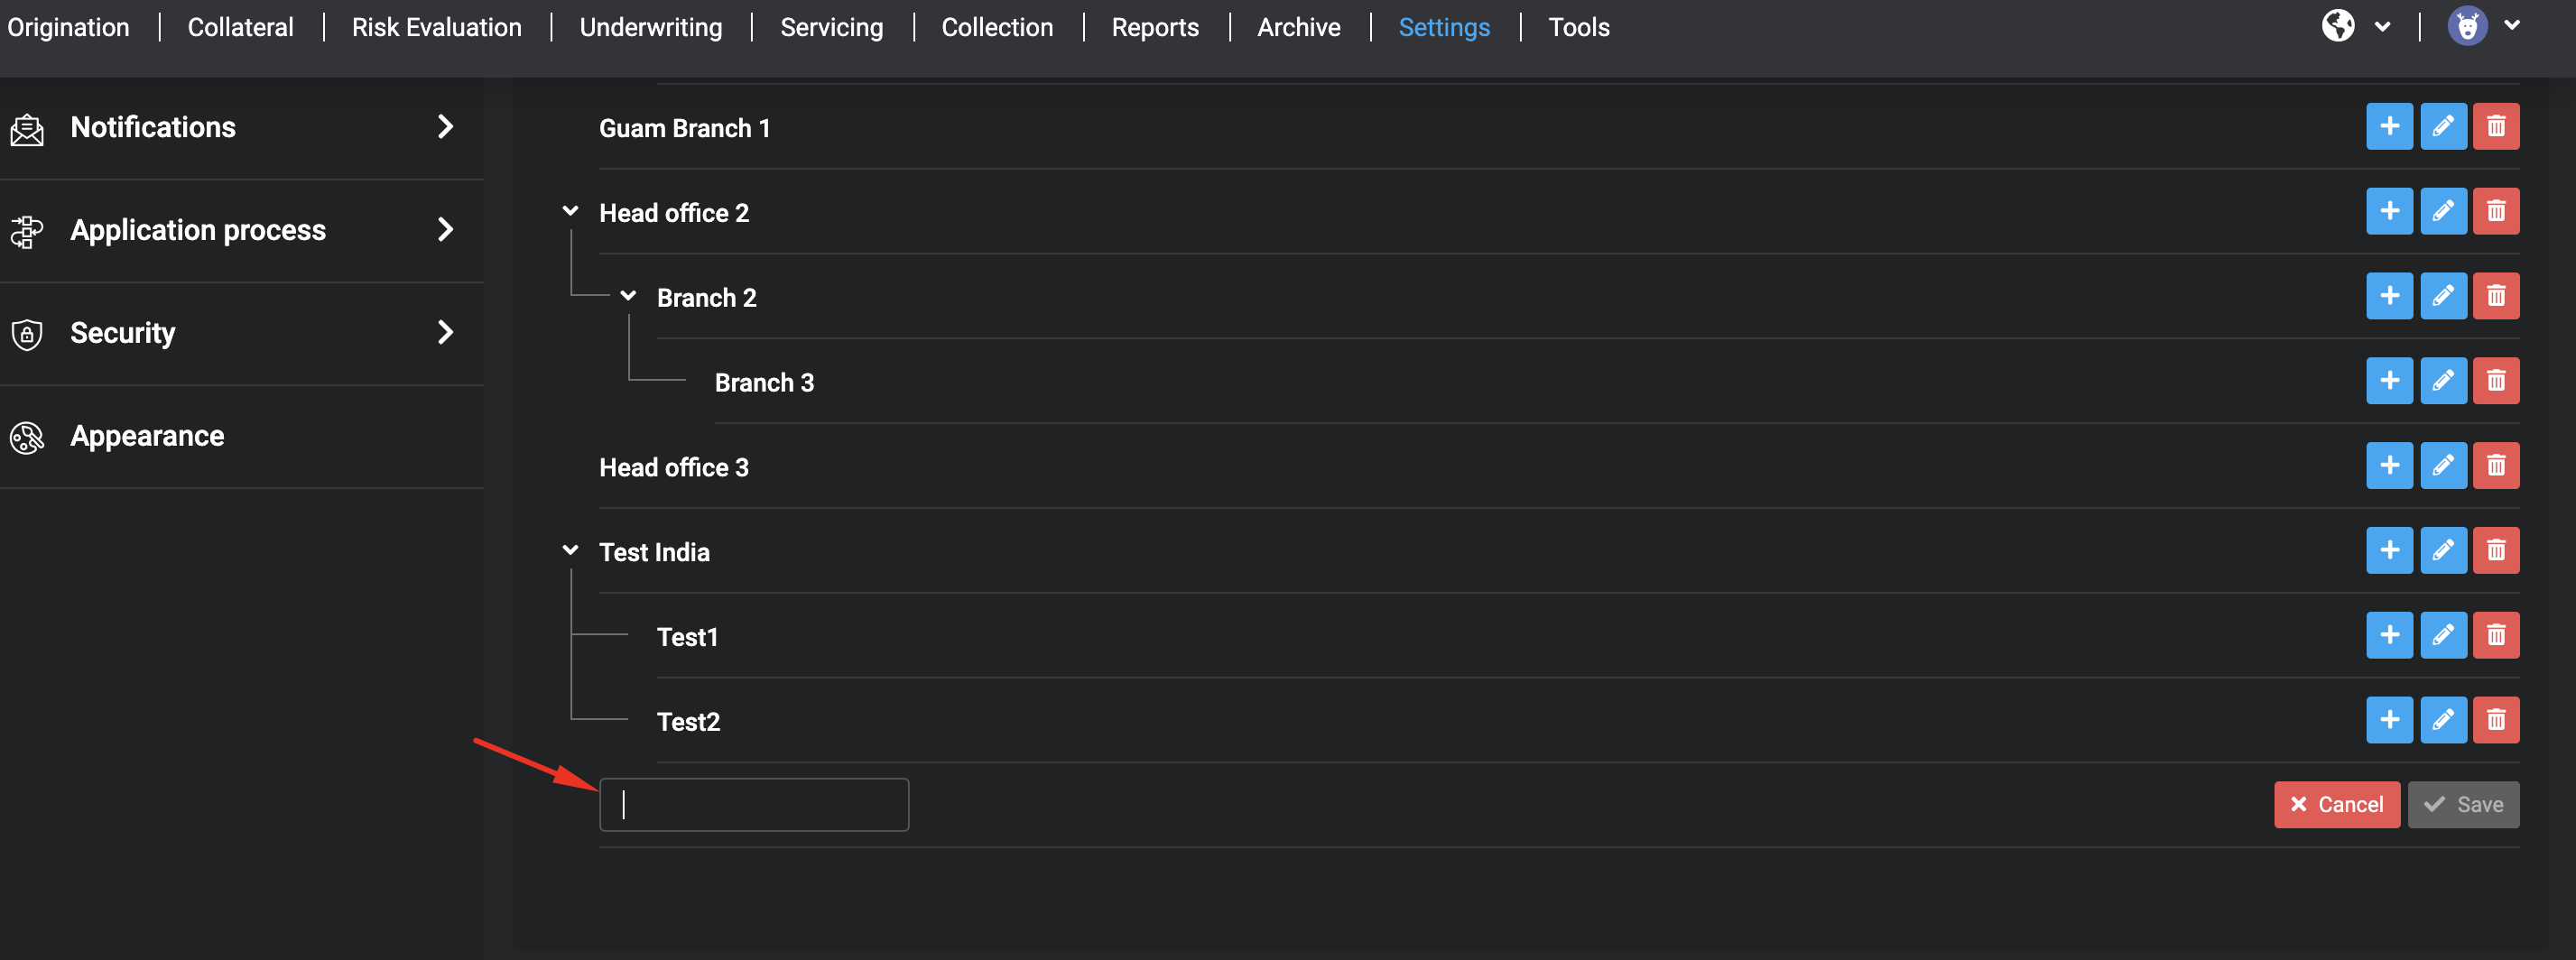
3. In the Name box, enter the name of a new Branch.
| Info |
|---|
The name of the branch must be unique. |
...
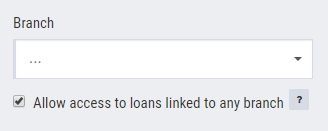
- In case if "Allow access to loans notlinked to a branch" is enabled, Back-Office user will see loans which are linked to his branch and sub-branches and loans which are not linked to any branch
- In case if "Allow access to loans notlinked to a branch" is disabled, Back-Office user will see only loans which are linked to his branch and sub-branches
5. Click OK.
Use the same steps for adding Sub-branch by clicking Add button.


Assigning User to the branch
1. In order to add a new User, navigate to System workplace - click on Users page.
2. Click the Add User button.

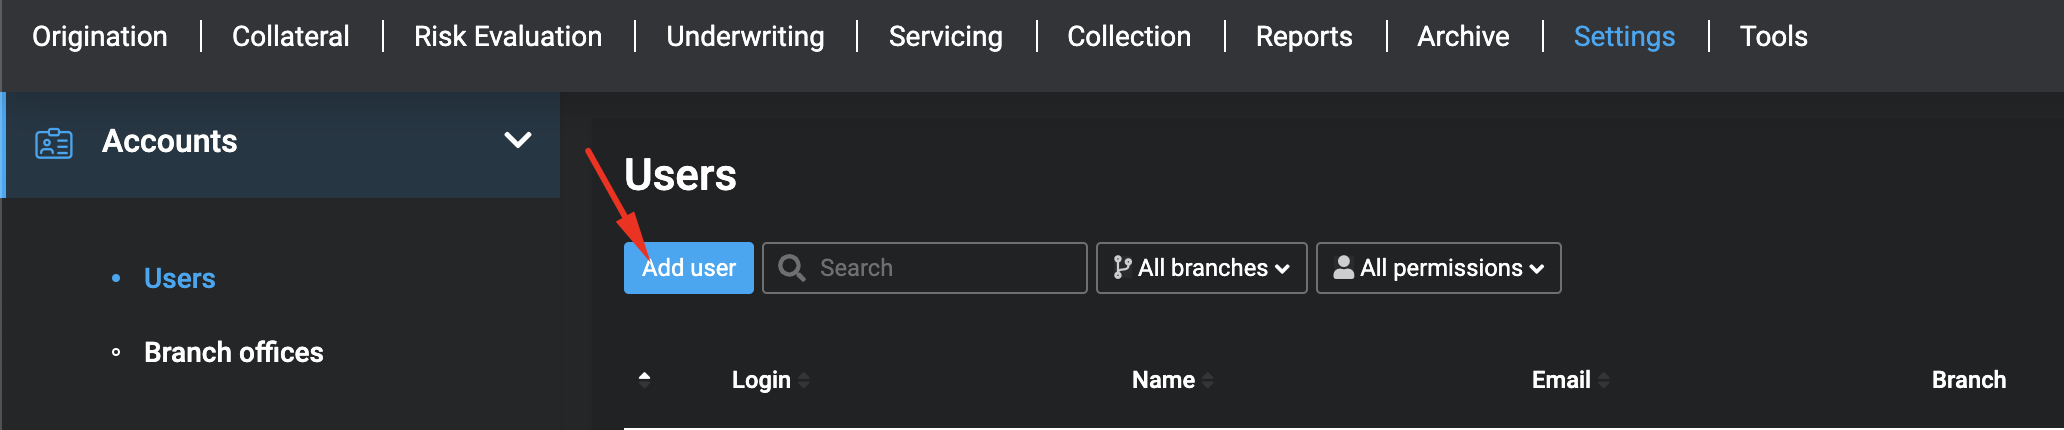
3. Set the Branch/Sub-branch from the drop-down list.
The Add User window with permissions opens:
 Any User can be assigned to a specific branch.
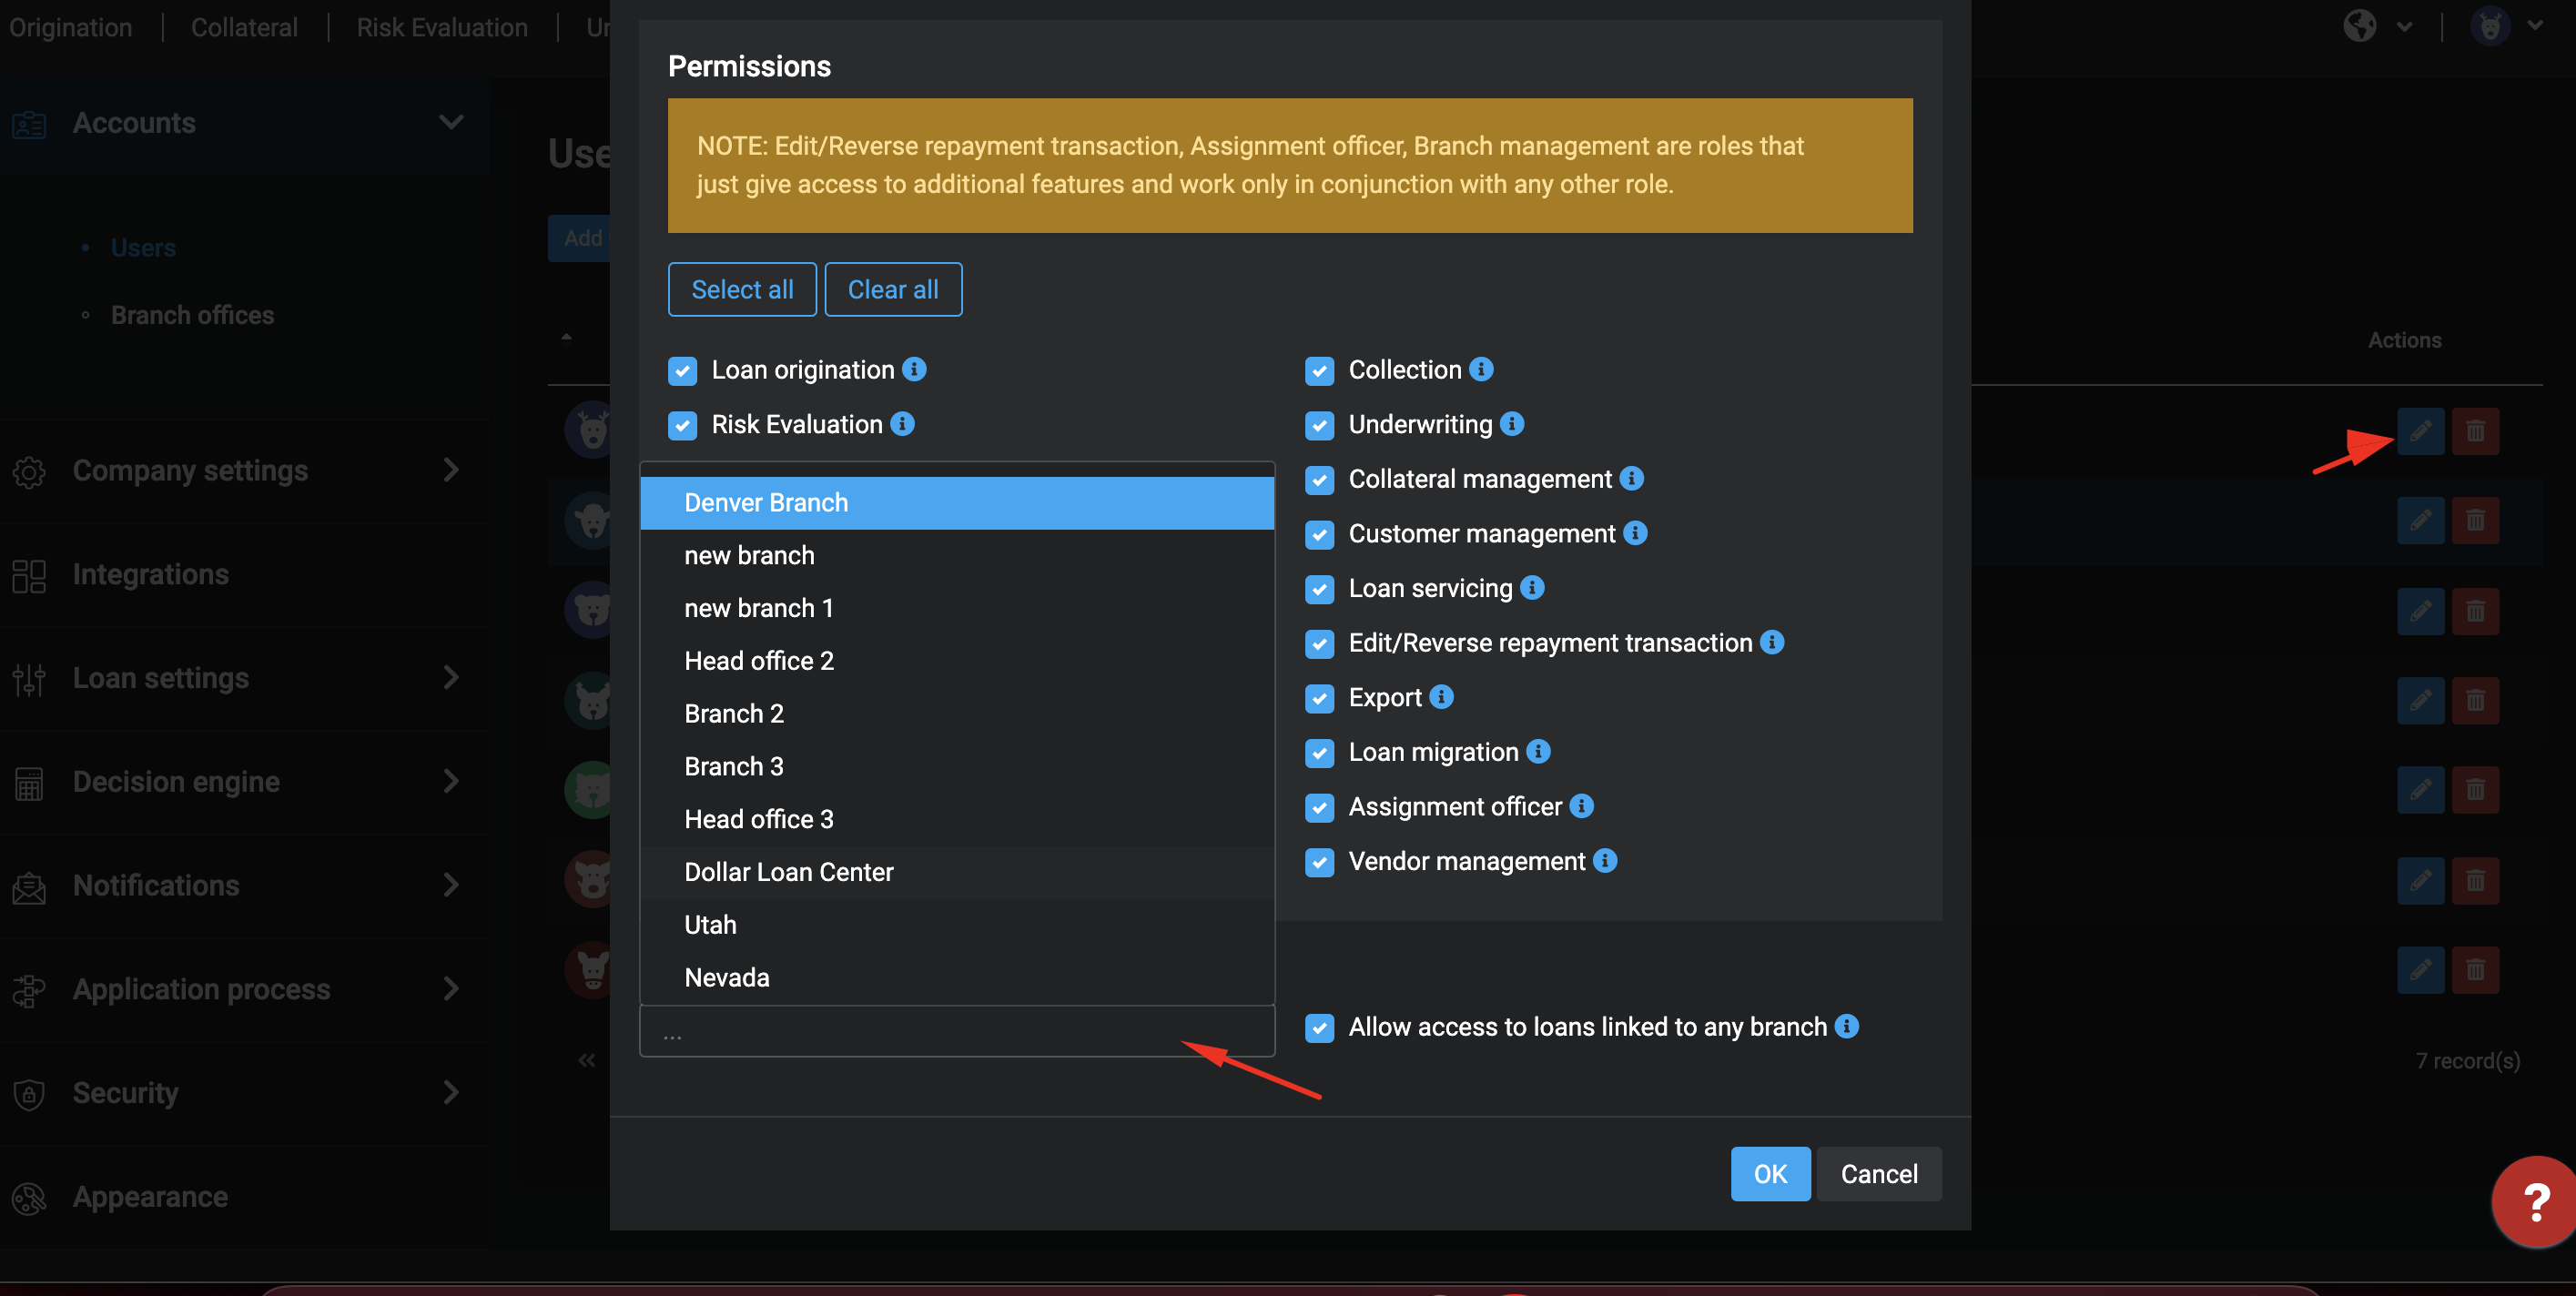
4. In the next step, you can configure permissions, which will determine which Loan Applications will be visible for corresponding Back-Office User
...
| Info |
|---|
Is case if the user is linked to a branch, permissions are configured by the branch settings |
5. Click OK.
Loan Header & Search Filters
If the Loan application is linked to a branch system will display Branch Name in the Loan Header


In order to display loans only from a particular branch or sub-branch Back-Office, users can use a search filter.
...
The filtering panel of the Branch Filter